This week I got email from a gentleman telling me he’s a community manager for a piece of software called Write!, which he talked up to me as a distraction-free text editor. He said he was looking for writers and/or bloggers to review the program or at least mention it on their websites, and offered a free license to try the program out.
Now, as y’all know I’m a big fan of Scrivener, which will continue to be my go-to tool for dealing with larger projects. On the other hand, if I want to write something short (say, the extremely rare short story), I sometimes feel that Scrivener’s actually a bit too complex a tool for that. Sometimes I just want to whip something out in a text editor and not have to worry about a lot of bells and whistles.
And hey, since the guy was offering a free license, I took him up on the offer. So here’s a post reviewing Write!, possibly the first of a few, just because I’m going to do this right and go over it in depth just to see what I’m dealing with here.
So what are we dealing with here?
I gotta admit I’m amused by the name, just because the exclamation mark is part of it, and that hearkens back to one of the very first things I ever used to write stuff: Scribble!, on my Amiga. So there’s a bit of nostalgia amusement there.
If you’re interested in checking the thing out for yourself, it lives at https://writeapp.co.
Pricing and subscription models and cloud access
$19.95 for the program, and a year after your purchase date, $4.95/year for cloud access and maintenance updates.
I’ll say straight up that I’m ambivalent about this pricing. I’m not a fan of subscription models for software; if I want to buy your thing, I’d like to just give you a decent amount of money for it and call it a day.
Also, from what I’m seeing on the site, they’re using their own proprietary cloud. I’m giving that a big side-eye, because if I were in the market to buy a new program for my writing work, a proprietary cloud would be a drawback for me. I’m already paying Dropbox for yearly access to their cloud. As a Mac user, I have access to iCloud. As a Google user, I have access to Google Drive. And as someone with a Microsoft account which I’ve needed to deal with Windows 10, I have access to OneDrive. And I even have an account on Box, even though I don’t use it as a rule.
Long story short, I have a whole pile of cloud accounts already and really don’t need another one. And in particular, given that I do have a paid Dropbox account and use it on a daily basis to save my most important documents, the idea of saving stuff out to another cloud that I might then later have to move to Dropbox is annoying. It feels like I’d be setting myself up for extra work.
On the other hand, to be fair, I will also note that I’m a computer professional in my day job. Because of this, I’m very aware that if you’re going to offer a product to the public, and you plan to do regular maintenance to it, that does take time and effort. And I absolutely agree that paying developers and QA fairly for their work is necessary. As you should expect, given that I’m an SDET in particular! So I’d be less cranky about paying for regular maintenance updates than I would be for access to the cloud, if I’d come at this software as a paying customer rather than a reviewer.
So, keep all this in mind if you want to decide whether this is useful to you. The pricing structure is not onerous. But whether or not that cloud access would be useful to you is a thing you should consider, particularly if you’re already a regular user of some other cloud service.
Starting up the actual program
Anyhow, thoughts about pricing and subscription models and clouds all aside, what’s the actual program like?
Starting it up on my Mac, I’m immediately presented with a login screen that looks like this:
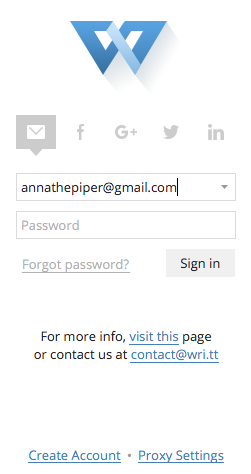
Which is, of course, the program asking you to log into your cloud account on their servers. And again, this is something I find annoying, because of the previous commentary re: a whole extra proprietary cloud service not being useful to me. There does not appear to be a way to start editing a local document without logging in, and I feel this is a roadblock between me and wanting to get some writing done, if all I want to do is start whipping out some paragraphs.
It’d also be a significant problem if either their servers were down, or your net access was. And given that during the winter it’s a pretty safe bet that I’ll have multiple power outages to deal with, a program that expects me to log into somewhere before I can use it is an immediate deal breaker. There really needs to be an option to start working locally without having to connect to the cloud.
That said, okay, let’s go ahead and log in. (The guy who contacted me did set me up with an account.)
When I’m logged in
I’m immediately greeted with some default Help text to tell me what I can do with this thing. That’s all okay; it’s an unfamiliar program, so a super-fast tutorial about the major features is a useful thing to see at startup.
It does however tell me that everything I write is automatically synced to the cloud. And right out of the gate, the first thing I’m looking for is “is there a way to make it not do that, if I don’t want to use their cloud?”
But let’s go over this thing menu by menu, and see what I can learn about it.
Menus in general
Since I’m looking at this on MacOS I am looking at the menu up on the main system menu bar, which is where I expect menu functionality to be. But there’s also an expandable menu you can get to by clicking on the icon in the upper left corner, which may be how you get to the menu on the Windows or Linux versions? I don’t know.
Write menu and Preferences
On the MacOS version of the menu I do see the standard first general program menu, which is where I expect to find the About option and the Preferences. And I do.
Preferences all seem fairly straightforward, and the most important option that leaps out at me is “Create new documents locally”. So for me, given that saving documents locally would be my preferred workflow, I’m going with “Create new documents locally” being on.
There are Preferences in four categories: General, Tools, Spellchecker, and Advanced. All of which seem generally straightforward, though there are certain ones that I’d want to turn off, such as Autocomplete. (This annoys me on my mobile devices and it’d annoy me here, too. I noticed it while playing with test text, so I’m glad I can turn it off.)
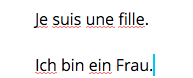
The spellchecker appears to be available for a whole bunch of different languages, which I could see being useful. Interestingly, by default, the ones that are turned on are Albanian, Catalan, Danish, English (US), French, German, Italian, Portuguese, and Swedish. Not a combination of languages I’d have expected!
I am however dubious about this spellcheck. Even with French and German turned on by default, it seems like it’s not actually spellchecking. Because this is what I see after typing a couple of simple sentences:
Under the Advanced section, there’s an option for turning on typing sounds. You have two options: Mechanical and Typewriter. I am half “how hipster can you possibly be” about this, and half kind of amused that that option is there. I probably wouldn’t use it, though, unless I were wearing headphones and had my laptop piping through to them.
The File menu: Creating, opening, importing, exporting, saving, and cloud vs. local
New Local Document/New Cloud Document
The first two options at the top of the File menu are New Local Document and New Cloud Document. If you have “Create new documents locally” turned on in Preferences, this apparently gives the command-N shortcut to “New Local Document”, and command-shift-N to “New Cloud Document”. If you turn the option off, it flips those around. I’m kind of okay with that.
Open, Open Folder, Open Recent
All these appear to be fine and I kind of like that you can open an entire folder at once, which might be helpful if you’ve already got your folders arranged the way you like them and you don’t want to mess with your file structure. The program comes with sidebars you can turn on and off, so if you’ve got the Local Documents sidebar on, there’s some almost Scrivener-like ability there to easily get at your files without having to actually leave the window you’re working in. So I’ll give it props for that.
Import
I cannot for the life of me figure out what file formats this thing thinks it can import. When I try to go into some of my working directories where I have assorted .txt and .docx files, it refuses to let me click on any of them. So unless there’s some sort of mystery option I’m missing here to turn this on (and I’m certainly not seeing anything in Preferences), Import functionality seems to be actively broken.
Save and Save As
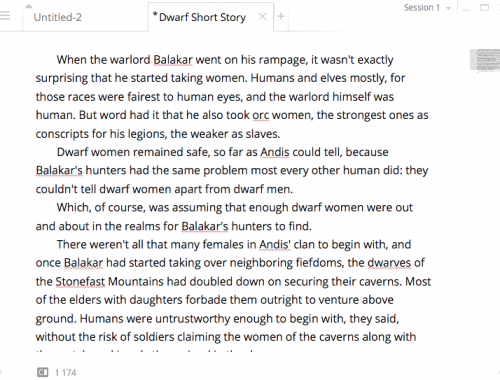
After typing an experimental paragraph, I find that I’m able to save a document locally via just the usual Save command. However, this is where I raise another eyebrow, because this is what I see for options for format when I save my test file:
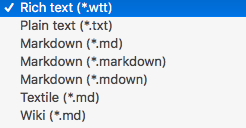
If you can’t see the screenshot, the options it shows are: Rich text (*.wtt), Plain text (*.txt), Markdown (with three different possible file extensions, *.md, *.markdown, and *.mdown), Textile (*.md), and Wiki (*.md).
These make me go “what” on several levels. One, the .wtt file format appears to be proprietary. Also unnecessary. Because if you’re saving in RTF, why aren’t you calling it RTF? Two, when I saved my test file as .wtt, MacOS had no idea what that was, and in fact wouldn’t let me assign the file extension to Write!. So I can’t just doubleclick on the file and launch it inside the program automatically. (Editing to add: actually, I found after I posted this that I could in fact go doubleclick on that file, even though it doesn’t have a thumbnail associated with it. So even though the functionality appears to have actually worked, this was not immediately obvious, and I did have a bit of a rocky path getting that to set up. I should not have done. If I’m going to save a .wtt file out from this thing, I’d like to see it be obvious that .wtt files are Write! files.)
Third, if I want to get to formats that might make this test file useful in anything else on my system, e.g., Word, e.g., Scrivener, e.g., TextEdit even, I have to export, not save.
Export
I tried exporting my test document down from the cloud in .txt, .pdf, and .docx format, since those are all things I could open locally on my system in other programs. All three of them came down in the correct format, though I did observe that the .docx file screwed up the indenting I tried on the two paragraphs in the file.
I would not see myself using this feature on a regular basis. At most it might be useful to me if I needed to get at one of my files on a machine that wasn’t my primary one. But again, that’s what I have Dropbox for.
Publish
There’s a Publish menu command that has two options you can take. The one for “Write!” appears to work only if you’re working with a document on their cloud, and from what I see in the dialog that comes up, it generates a shortlink for you, and gives you the option to also share that link on Facebook, Twitter, Google+, or LinkedIn. You can also email the link, and you can add a comment to it.
The dialog also says that links remain active for at least a year since last viewed, or as long as your account is active. And there’s a link to click on for “Manage Links”, but that just takes you up to the app’s webpage and your account settings there.
This essentially seems like it’s the equivalent of putting a file up on Dropbox and giving people the link to it, so okay yeah that’s fine. My only beef with this functionality is that you can’t delete a link once you’ve created it. This strikes me as suboptimal.
The other option on the Publish menu is, of all things, an option for publishing to Medium. Which, I suppose, means that if you’re a Medium user, this program can act as a client for you to write your posts to put up there. But as I am not a Medium user, this option would be less than useful to me. And it is intriguing to me that Medium is the only publishing platform that has an option here–there’s no WordPress, no Blogger.
Move to Cloud/Move from Cloud
There’s a “Move to cloud” under the file menu, so when I use that, I see that my test file does indeed jump up to the cloud. I see the file appear in the “Cloud” panel on the left of the screen. And up on their webpage, if I go into my account settings and tell it to export my file in .txt format, I do get a .txt download from there. I also note with interest that my local copy of the file doesn’t actually go anywhere, so that’s good. I would not, repeat, not want any file I’d be storing on their cloud to only be stored on their cloud.
And since one of this program’s selling points is that your changes are in fact auto-synced up to the cloud, I can confirm that a few small changes I made to what I was typing did get up there without me having to save anything. I am not convinced that this is a selling point for me, though. MacOS already autosaves in native OS apps at this point and has for a few years now. (And, just because I’m a computer professional for whom ctrl-S and command-S are ingrained in muscle memory, the idea of the program autosaving for me is only somewhat helpful to begin with.)
When I move my test document to the cloud, the menu option I’d used becomes “Move from cloud”. When I try that option, it wants me to save the file locally again. And it does let me overwrite the local version I’d saved before.
So in general, after playing with this functionality, my initial suspicion is confirmed: if I were to use this thing on a regular basis, I’d be bypassing its cloud functionality entirely and just working with stuff locally on my system.
Start New Session
This program appears to let you run more than one session at once, with different files involved. Which I suppose is handy if you’re working on concurrent projects, though I’m not sure it’d be intuitive for me. I’m not seeing a way to look at different sessions in their own windows. You can switch between sessions by clicking on a down arrow up in the top right corner, but that’s small and easily overlooked.
Opens a simple print dialog. Which is less simple than it should be, actually. I land on a page setup dialog first when I open this, and only after clicking OK there do I land on the main MacOS print dialog.
Next post, I’ll talk about the Edit and Format menus and about what it’s like to actually just write in this thing. Stand by for Part 2!